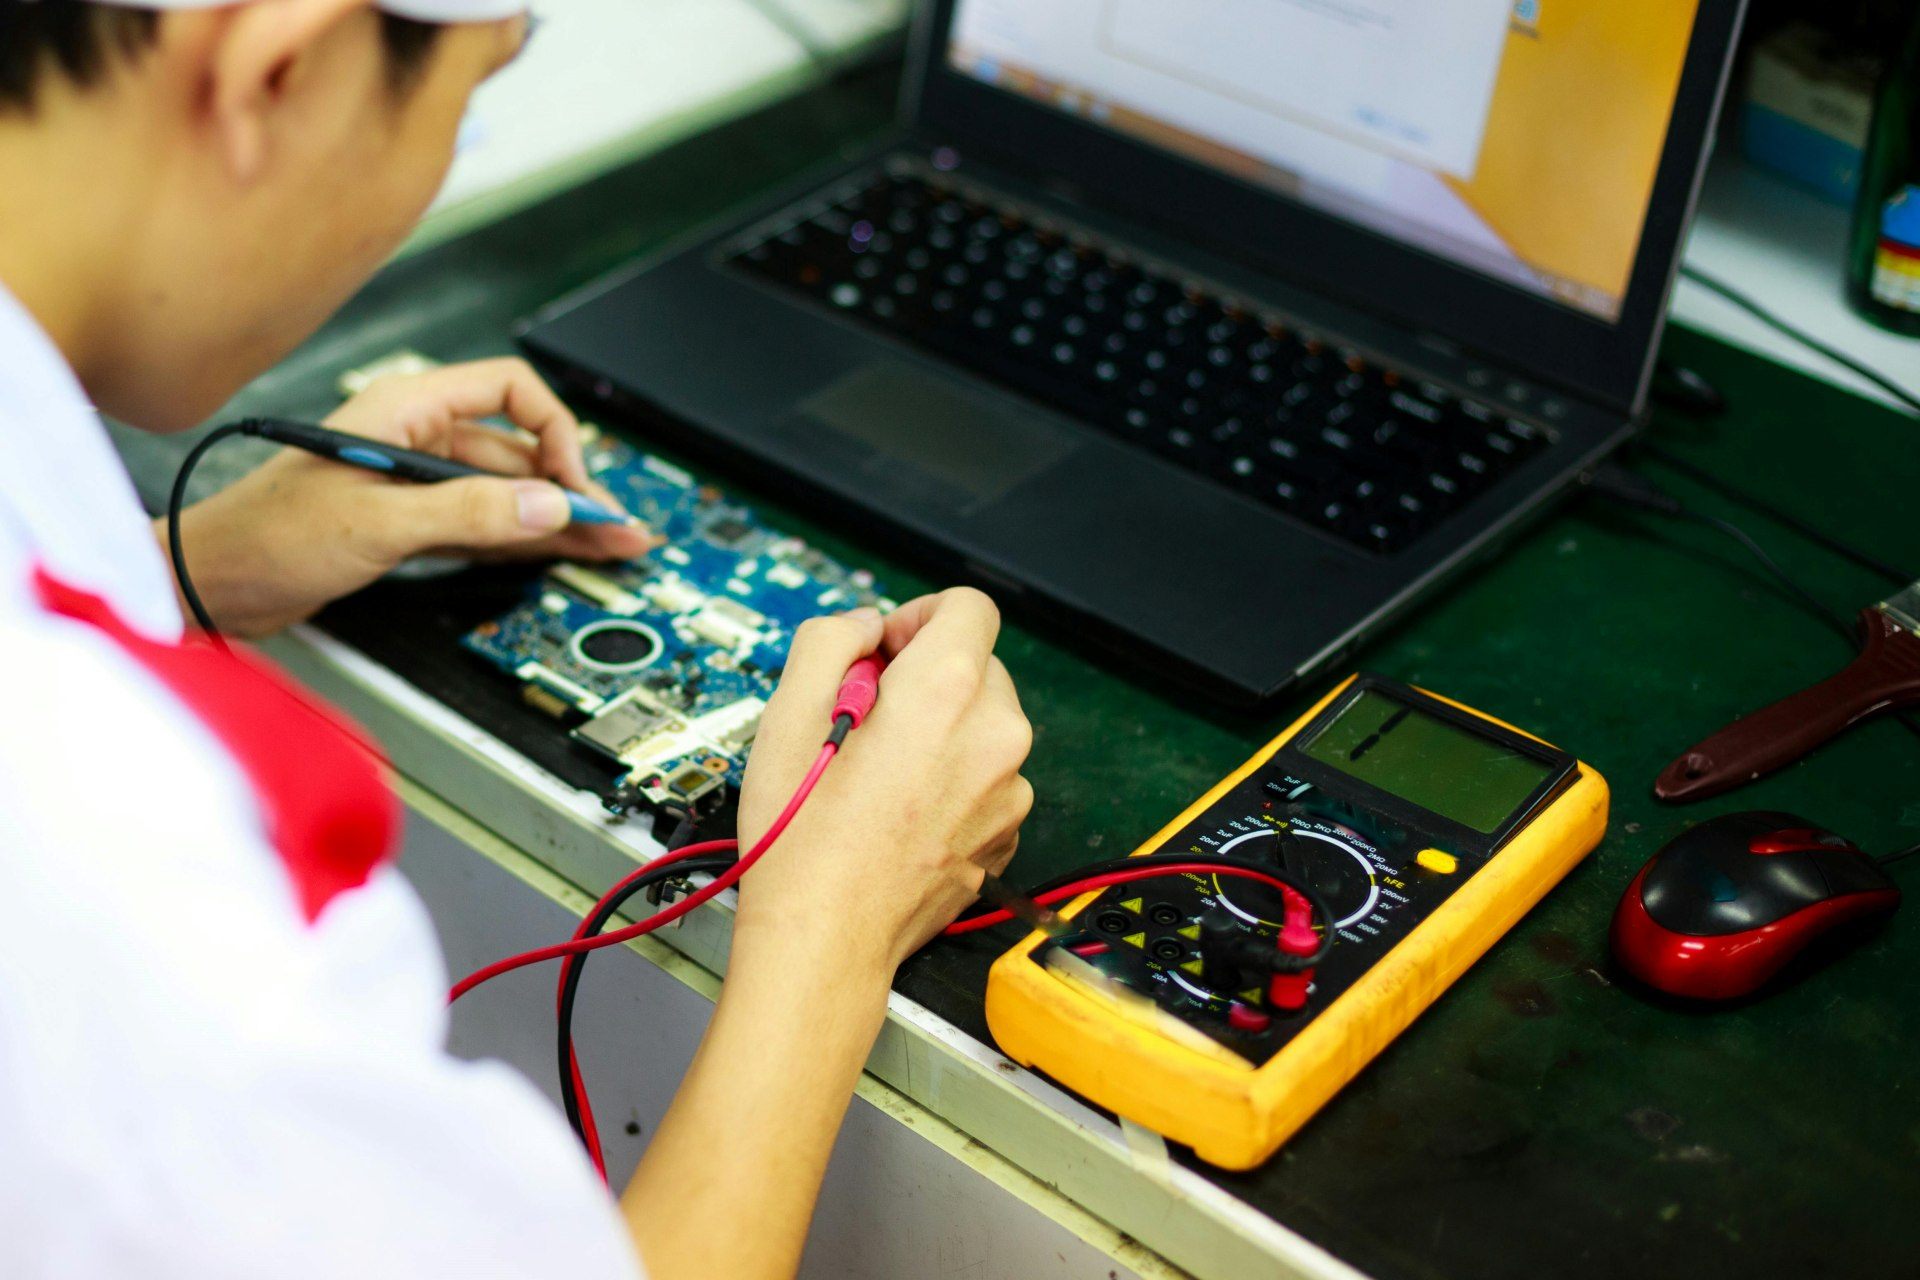
A multimeter is one of the most essential tools in mobile phone repairing. Whether you are troubleshooting power issues, tracking short circuits, or testing tiny components on the motherboard, this tool helps you diagnose faults with accuracy.
Understanding how to use a multimeter not only makes your work easier but also improves the chances of repairing a device correctly on the first attempt.
“Good tools make you skilled. Understanding those tools makes you unstoppable.”
This guide explains everything in a clean, simple manner — what a multimeter does, how to use it in phone repair, the meaning of each mode, real-life examples, and practical tips from repair experience. Even if you’re a complete beginner, you’ll feel confident using a multimeter by the end of this article.
What Is a Multimeter and Why Is It Important in Mobile Repair?
A multimeter is a measuring instrument used to test voltage, resistance, continuity, and electronic components. In mobile phone repair, it helps technicians to:
- Check whether the battery or charging section is working
- Detect short circuits on the motherboard
- Measure voltage output from charging points
- Test components like resistors, capacitors, speakers, ringers, and microphones
- Verify if tracks and connections are intact
- Diagnose dead or non-booting devices
The multimeter acts like the eyes of a technician. Without it, you are guessing. With it, you know exactly what is happening inside the phone.
“Electronics don’t fail without a reason — a multimeter helps you find that reason.”
Types of Multimeters: Which One Should You Use?
There are two major types:
1. Digital Multimeter (DMM)
This is the most widely used multimeter today. It shows readings in numerical form on a screen and gives faster, more accurate results.
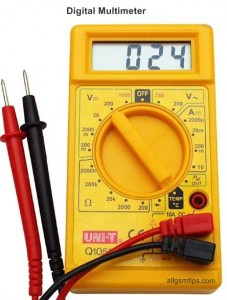
Benefits:
- Easy to read
- More accurate
- Compact and lightweight
- Ideal for delicate smartphone components
- Has built-in functions like auto-range in advanced models
2. Analog Multimeter
This multimeter uses a needle and scale to show readings. It is old, retro type used by a very few old and senior technicians only.
Older technicians still like it because:
- It shows variations smoothly
- It works well for some deep testing scenarios
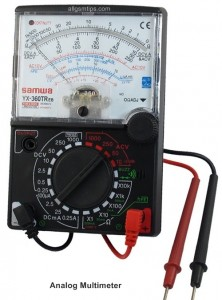
However, for mobile repair, digital models are preferred because the components are very small and require precise measurement.
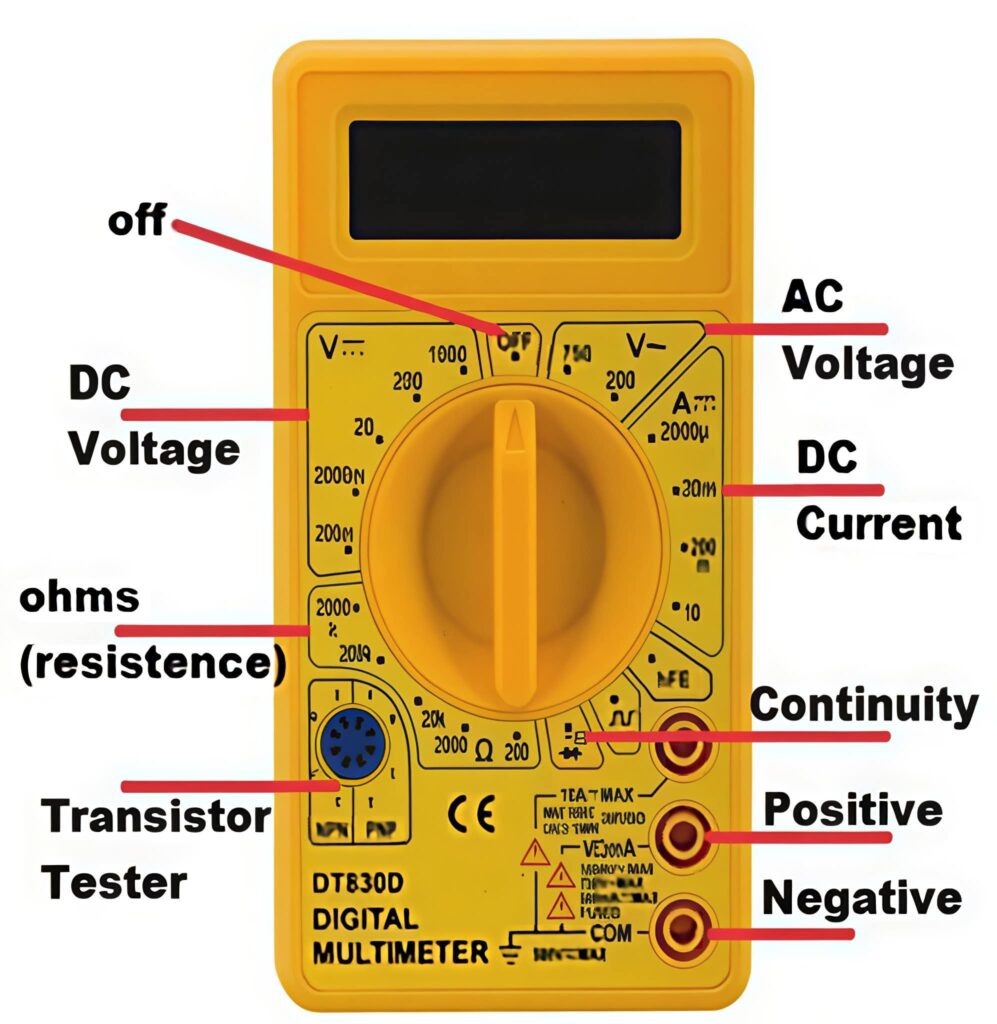
Understanding Probes and Ports
Every multimeter comes with two probes:
- Red probe = Positive (+)
- Black probe = Negative (–)
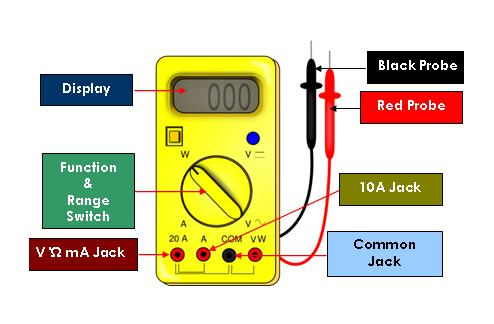
On the meter, you’ll see port labels such as:
- COM → Common port (black probe goes here)
- VΩmA → Voltage/Resistance port (red probe goes here)
- 10A/20A → High current port (not used in mobile repair)
For mobile phone diagnostics, you only use COM and VΩ ports. Insert black probe in COM port and the black probe in the VΩmA port
Incorrectly inserting probes into the high-current port can damage both the meter and the phone, so handle carefully.
Important Multimeter Settings Used in Mobile Repair
A multimeter has several settings, but mobile technicians mainly use these 3 settings only:
1. DC Voltage Mode (V⎓)
This mode is used to measure the voltage of:
- Batteries
- Battery connectors
- Charging input
- Power rails on the motherboard
- Boost converters and regulators
How to Use DC Voltage Mode
- Turn the dial to DC voltage (symbol: V with straight line and dots).
- Connect the black probe to ground (battery negative or metal shielding).
- Touch the red probe to the point you want to measure.
- Read the voltage displayed on the screen.
Use Cases in Mobile Repair
- Checking if the battery has proper voltage
- Testing whether the charging port is supplying power
- Verifying voltage at PMIC output lines
- Checking if the phone is getting power when the ON button is pressed
Example
A healthy Li-ion mobile battery normally shows around 3.7V–4.3V depending on charge level.
If the battery connector shows 0V, the device will not power ON — a sign of a charging IC or power rail issue. Learn how to check a smartphone battery with a multimeter in details
2. Resistance Mode (Ω)
Resistance mode helps measure:
- Resistors
- Coils
- Internal lines
- Microphone types
- Faulty components in the network section
How to Use Resistance Mode
- Set the multimeter to Ω.
- Touch the probes to both ends of the component.
- Compare the reading with standard values or schematic diagrams.
Use Cases in Mobile Repair
- Testing resistors and their values
- Checking if a coil is open
- Identifying high-resistance lines causing signal issues
- Testing electret microphones (older devices)
- Checking component failure after water damage
If a resistor reads 0Ω or extremely high Ω beyond its rated value, it is faulty.
3. Continuity Mode (Beep Mode / Diode Mode)
This is one of the most used settings in phone repair.
What It Does
When you touch two points that are connected internally, the multimeter:
- Beep sound (in most models)
- Or shows a continuity reading (in some models)
This mode helps you check if a track, line, or component connection is complete.
How to Use Continuity Mode
- Set the dial to the continuity or diode symbol.
- Touch the two probes together — you should hear a beep.
- Now touch the probes to the two points you want to test.
Use Cases
- Checking broken PCB tracks
- Checking jumpers
- Testing speaker terminals
- Testing ringer and vibrator motor
- Checking whether the motherboard has a short circuit
- Testing battery connector polarity
Detecting a Short Circuit
Shorting is a common issue in dead or overheating phones.
To test:
- Place probes on the battery connector terminals.
- Check in one direction.
- Reverse the probes and check again.
Results:
- Beep both ways → Motherboard is short
- Beep only once → Normal
- Very low diode reading both ways → Short
- One side shows value, other side shows 1 (open) → Normal
Different phones show different readings, so rely on pattern recognition and experience.
Testing Common Components Using a Multimeter
Below is a practical guide for checking the most common parts in a mobile phone.
1. Testing a Speaker
Speakers usually show a resistance between 8Ω–32Ω.
Steps:
- Set the meter to continuity or resistance.
- Touch probes to speaker terminals.
- Beep or a stable resistance value = good speaker.
- No response = speaker damaged.
2. Testing a Microphone
Modern smartphones use digital microphones, which require dedicated testing tools. However, older devices had electret mics that can still be tested.
Steps for older mic types:
- Use the resistance mode.
- Check for reading within specified range.
If readings are unstable, the mic may be faulty.
3. Testing a Ringer / Buzzer
Buzzers behave like speakers.
Steps:
- Use continuity mode.
- Beep or small resistance = working.
- No beep = faulty.
4. Testing Charging Connector
A multimeter helps detect:
- Loose connector
- Faulty pins
- No output voltage from the charger
Steps:
- Use DC voltage mode.
- Connect charger.
- Check pins for output (usually 5V).
If voltage is missing or fluctuating, the charging section needs repair.
5. Testing Battery Health
A battery is considered functional if it holds sufficient voltage.
Typical values:
- Fully charged: 4.2V
- Normal state: 3.7V–3.9V
- Deep discharge: below 3.0V
Batteries below 3.0V might not charge and may need boosting.
How to Check Short Circuits on the Motherboard
Short circuits are one of the most common causes of dead phones.
Steps:
- Set the meter to continuity or diode mode.
- Place probes on battery positive and negative.
- Listen for the beep.
Beep in both directions = Short circuit.
Beep only one way = Normal.
Once a short is confirmed, technicians begin isolating sections such as:
- Charging IC
- PMIC
- Capacitors
- CPU/SoC lines
Most shorts are caused by tiny capacitors near the battery line.
Read in detail how to check shorting in mobile phones.
Best Practices for Using a Multimeter in Mobile Repair
Using a multimeter correctly not only gives accurate results but also protects sensitive components.
✔️ Always use the correct mode
Using the wrong mode, especially AC voltage, can damage your motherboard.
✔️ Keep probes steady
Shaking hands can touch multiple lines and cause further damage.
✔️ Understand ground points
The metal shield, screw areas, and negative terminal all serve as ground.
✔️ Use sharp probes
Sharp tips help test tiny SMD components.
✔️ Avoid cheap multimeters
They give inaccurate readings that can lead to wrong diagnosis.
✔️ Compare readings with another working board
This is the best way to train your understanding.
Real-Life Repair Scenarios Using a Multimeter
Below are common examples from practical repair work.
Scenario 1: Phone Not Powering On
Steps:
- Test battery voltage (DC mode).
- Test battery connector output.
- Check continuity between power button line and ground.
This identifies whether the issue is with the battery, connector, or power IC.
Scenario 2: Phone Overheating
Overheating often indicates a short.
Use continuity mode to test major power rails. If the meter beeps both ways, the line is short.
Scenario 3: Not Charging
Use DC voltage mode to:
- Check voltage at charging port
- Test input at charging IC
- Verify voltage reaching battery terminal
This helps pinpoint whether the problem is mechanical or motherboard-level.
Common Multimeter Mistakes Technicians Should Avoid
- Using multimeter on wrong mode
- Touching components with excessive pressure
- Testing on wet motherboards
- Not removing the battery while testing resistance
- Assuming all beeps indicate a short
- Using low-quality probes
Even experienced technicians occasionally make these mistakes, so awareness is important.
Conclusion
A multimeter is one of the smartest investments you can make as a mobile repair technician. With this single tool, you can diagnose power issues, find shorts, test components, and understand the health of the motherboard.
More importantly, it builds your confidence.
A technician who knows how to use a multimeter can solve almost any hardware-level problem.
“Master your tools, and your tools will master every fault you face.”