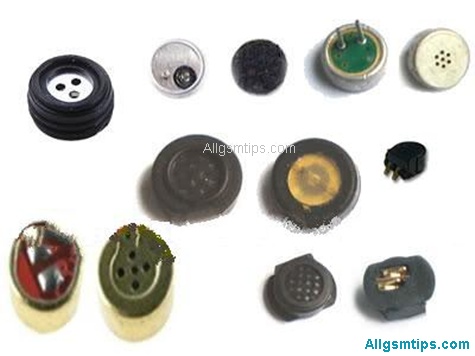
In cell phones, during a call, when you speak, your voice goes into the mic. A mic converts voice into electrical signal. It is also called microphone and mouthpiece. It will always be at the buttom, inside a cell phone. If it becomes faulty, your voice will not be heard by the person you are talking to. You can try using an earphone (headset) and try if your voice is being transmitted! The method to check it will be the same for any brand or model of a mobile phone or a tablet be it an iPhone, a Samsung Galaxy, a Sony Xperia or a Nokia. You can check it with either a digital or an analog multimeter, but most technicains today prefer digital multimeters as analog ones are outdated.
Steps to check mic of a cell phone
- Turn off your cell phone and dismantle it carefully. If you do not know how to dismantle your handset, you can watch videos of its disassembly procedure on Youtube!
- Now remove the mic which is located at the buttom. There is a small hole at the buttom of the casing (body panel) for the voice to enter the mic. The mic will always be exactly below it inside the casing.
- Now keep the multimeter on resistance setting. It may be indicated by the symbol ‘Ώ’. In resistance too, there are many settings. Keep it on 20K or 20KΏ setting.
- Now touch the tip of the 2 probes of the multimeter (the red and the black wires) to the 2 terminals (pins) of the mic. Now move your mouth very near to the mic and blow air into its hole. If the reading on the screen increases rapidly, your mic is good and working. In most mics, the reading rapidly increases to around 100. And if the reading is still 1 after blowing air, your microphone is faulty.
Read our guide How to use multimeter in cell phone repairs
Second method to check microphone
The other option to check or test mic of a mobile phone or a tablet is to put it in any other same working model (or a handset with the same shape and size mic) and check if its working properly in it. If its not working, its faulty. It’s as simple as that! For checking, its not necessary to call someone. You can check it through voice recorder function easily.
Note: If your mic is ok and still your voice is not being transmitted during a call, check if it is connecting properly with the PCB. Clean its contact points on the PCB (Printed Circuit Board) with an eraser. If the mic is soldered, you will have to check if its soldered properly. If its not, resolder it properly. Also try replacing with a new one. Still if the fault doesn’t go, there may be a complicated hardware problem in the PCB. It will either be due to a broken track which is supplying voltage to the mic or due to a faulty IC. You will have to repair it by following schematic diagrams.
Please also let us know if you found the guide to helpful in the comments below.
